
Table of Contents
Introduction
Ever since I shared my foolproof method for whipping up cake pops, I’ve been bombarded with requests for a Starbucks-inspired version, and let me tell you, this Starbucks cake pop recipe is an absolute game-changer—so simple, you’ll wonder why you ever paid $3.75 for just one! Starbucks cake pops have become a sensation, and it’s no surprise why. These bite-sized treats are not only adorable but also insanely delicious. But here’s the thing: you don’t have to make a trip to Starbucks every time a craving hits. With this Starbucks cake pop recipe, you can recreate those famous cake pops right in your own kitchen.
At Samuel Recipes, we’re all about making cooking fun, accessible, and downright enjoyable. Whether you’re a busy parent trying to whip up something special for your kid’s birthday party or a baking enthusiast looking for your next project, this Starbucks cake pop recipe is perfect for you. And the best part? You can customize it to suit your taste, dietary needs, and even the theme of your next big event. So, grab your mixing bowls, and let’s dive into this sweet adventure together!
1. Why Make Starbucks Cake Pops at Home?
Cost-Effective and Convenient
Let’s be honest—those cake pops at Starbucks are tasty, but they sure can add up quickly! In the name of research (and because I can’t resist a sweet treat), I once bought two Starbucks cake pops, and it set me back over SEVEN DOLLARS. For just two! With this Starbucks cake pop recipe, you can make 24 cake pops for only $8, which means each one costs you just $0.35. Yep, you read that right—$0.35! That’s a fraction of what you’d pay at the coffee shop, and you get a whole batch of these delightful treats to enjoy.
Making a Starbucks cake pop recipe at home is incredibly convenient, especially for busy parents, students, and professionals. You can whip up a batch over the weekend and have them ready for the week ahead. Whether you’re packing them in lunchboxes, serving them as a dessert after dinner, or enjoying them as an afternoon pick-me-up, this Starbucks cake pop recipe is sure to satisfy your sweet tooth without the need for a Starbucks run.
Customization and Creativity
One of the best parts about making Starbucks cake pops at home is the ability to customize them to your heart’s content. Want to make them chocolate instead of vanilla? Go for it! Prefer red velvet or lemon cake? No problem! You can even mix and match flavors to create a cake pop that’s uniquely yours. The possibilities are endless.
And let’s not forget about the decorations. Whether you’re making them for a birthday party, a holiday celebration, or just because, you can get as creative as you want with colors, sprinkles, and designs. Plus, it’s a super fun activity to do with kids, friends, or even solo when you’re feeling a little crafty. Trust me, the satisfaction of biting into a cake pop you’ve designed yourself is next-level.
Healthier and Diet-Friendly
Now, I know some of you are looking for ways to enjoy your favorite treats while sticking to a diet or managing food allergies. The good news is that when you make Starbucks cake pops at home, you have complete control over the ingredients. Want to make gluten-free cake pops? Use a gluten-free cake mix. Need a vegan version? There are plenty of plant-based frostings and cake mixes available. Watching your sugar intake? You can easily reduce the amount of sugar or use a sugar substitute.
By tweaking the ingredients, you can create a cake pop that fits your dietary needs without sacrificing flavor. It’s all about finding that sweet spot (pun intended) where delicious meets nutritious.
2. Ingredients & Substitutions for the Best Starbucks Cake Pop Recipe

Essential Ingredients for Starbucks Cake Pops
To make the best Starbucks cake pops at home, you’ll need a few simple ingredients. Here’s what you’ll need to get started:
- Vanilla Cake Mix: This is the foundation of your cake pops. You can use your favorite brand, or even a homemade vanilla cake recipe if you’re feeling extra ambitious. The cake mix provides that light, fluffy texture that we all love in cake pops.
- Vanilla Frosting: The frosting is what holds the crumbled cake together and gives the cake pops their signature moistness. Store-bought frosting works just fine, but feel free to whip up a homemade version if you prefer.
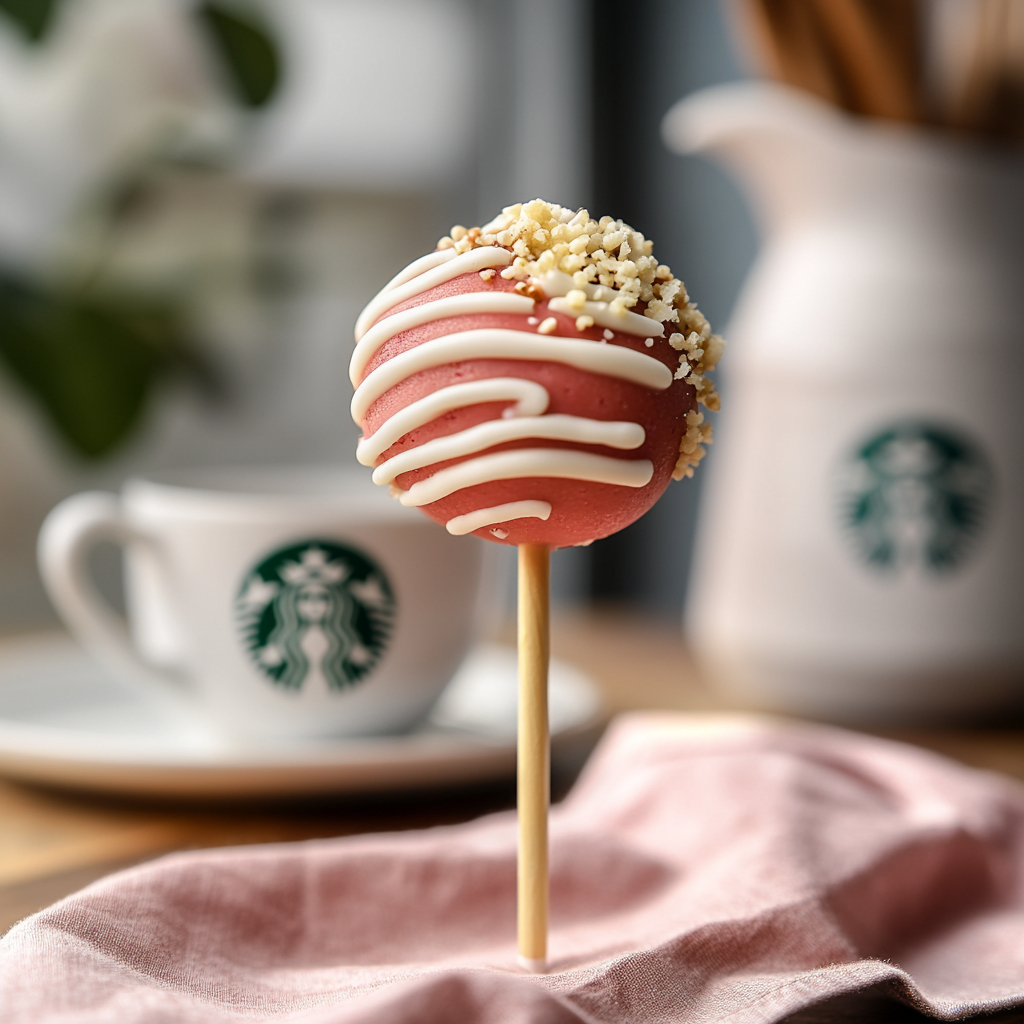
- Pink Candy Melts: These are essential for achieving that iconic Starbucks cake pop look. Pink is the classic color, but you can choose any color you like depending on your theme or occasion.
- Lollipop Sticks: These are non-negotiable if you want your cake pops to look like the real deal. You can find them at most craft stores or online.
- White Sprinkles: These are optional, but they add a fun finishing touch that mimics the original Starbucks cake pops.
Substitution Ideas for Starbucks Cake Pops Recipe
Now, let’s talk about making this recipe work for everyone. Whether you have dietary restrictions or just want to try something new, here are a few substitution ideas:
- Gluten-Free Cake Mix: If you’re avoiding gluten, simply swap the regular cake mix for a gluten-free version. There are plenty of great options available that taste just as good as the original.
- Vegan Frosting: Need to keep things dairy-free? Use a vegan frosting. You can find several store-bought options, or make your own with plant-based butter and powdered sugar.
- Chocolate Cake Mix: Craving something a little richer? Use a chocolate cake mix instead of vanilla. This will give your cake pops a decadent, chocolatey flavor that’s hard to resist. Pair it with chocolate frosting for a double-chocolate treat!
- Natural Food Coloring: If you’re looking to avoid artificial colors, there are plenty of natural food coloring options available. You can also use things like beet juice or turmeric to achieve beautiful colors naturally.
- Low-Sugar Options: Watching your sugar intake? Use a low-sugar cake mix and frosting. You can also reduce the amount of frosting you mix into the cake crumbs for a less sweet, but still delicious, treat.
With these substitutions, you can easily tailor the recipe to fit your needs or preferences without sacrificing flavor or fun.
3. Step-by-Step Instructions for make your Starbucks Cake Pop Recipe

Now that you’ve gathered all your ingredients, it’s time to dive into the fun part—making your Starbucks cake pops! This step-by-step guide will walk you through the process, ensuring that your cake pops turn out just as delicious as the ones you’d get at Starbucks (if not better!).
Preparing the Cake
- Bake the Cake:
- Preheat your oven according to the instructions on your cake mix box. Prepare the cake mix as directed and pour the batter into a greased cake pan.
- Bake the cake until a toothpick inserted into the center comes out clean. The baking time will vary depending on the size of your cake pan, but it typically takes about 25-30 minutes.
- Once the cake is baked, allow it to cool completely in the pan. This step is crucial—if the cake is too warm, it will crumble unevenly and the frosting may melt.
- Crumble the Cake:
- After the cake has cooled, crumble it into fine crumbs using your hands or a fork. You want the crumbs to be as even as possible, so take your time with this step.
- Transfer the cake crumbs into a large mixing bowl.
Forming the Cake Pops
- Mix in the Frosting:
- Add the vanilla frosting to the cake crumbs a little at a time. Start with about 1/3 cup of frosting and mix it into the cake crumbs using your hands or a spatula.
- Continue adding frosting until the mixture holds together when pressed. Be careful not to add too much frosting, or your cake pops will be too soft and difficult to shape.
- Shape the Cake Balls:
- Once your cake mixture is the right consistency, it’s time to shape it into balls. Use a small cookie scoop or a spoon to portion out the mixture. Roll each portion between your palms to form a smooth, round ball.
- Place the cake balls on a lined baking sheet. You should end up with about 24-36 cake balls, depending on their size.
- Chill the Cake Balls:
- Place the baking sheet in the refrigerator for at least 2 hours, or in the freezer for 30 minutes, to allow the cake balls to firm up. This step is essential for helping the cake pops hold their shape during dipping.
Dipping and Decorating
- Melt the Candy Melts:
- About 5 minutes before removing the cake balls from the fridge or freezer, start melting your candy melts. Place the candy melts in a microwave-safe bowl and heat them in 30-second intervals, stirring between each interval until fully melted and smooth.
- If the melted candy is too thick, you can add a teaspoon of vegetable oil or shortening to thin it out.
- Dip the Cake Pops:
- Take one lollipop stick and dip the tip into the melted candy. Insert the stick about halfway into a chilled cake ball. This helps secure the stick in place and prevents the cake pop from falling off during dipping.
- Dip the entire cake pop into the melted candy, making sure it’s fully coated. Gently tap the stick on the edge of the bowl to remove any excess coating.
- Decorate and Set:
- Immediately after dipping, add your sprinkles or other decorations while the coating is still wet. Stand the cake pop upright in a cake pop stand or poke the stick into a block of Styrofoam to keep it in place while it sets.
- Repeat the dipping and decorating process with the remaining cake pops.
- Let the Cake Pops Set:
- Allow the cake pops to stand at room temperature until the candy coating is completely set. This usually takes about 30 minutes. Once set, your cake pops are ready to be enjoyed!
By following these steps, you’ll end up with perfectly shaped, beautifully decorated Starbucks cake pops that are sure to impress. Whether you’re making them for a special occasion or just because, these treats are guaranteed to be a hit!
4. Tips and Tricks for a Perfect Starbucks Cake Pop Recipe
Even though making cake pops is a fun and straightforward process, a few handy tips can make all the difference between good cake pops and perfect cake pops. Let’s dive into some tricks that will help you avoid common pitfalls and achieve bakery-worthy results every time.
Chilling Time for Your Starbucks Cake Pop Recipe
Chilling is a critical step in ensuring that your cake pops hold their shape. Here’s why:
- Firmness: After rolling your cake balls, it’s essential to chill them long enough to become firm. This firmness helps them stay on the stick during the dipping process and prevents them from falling apart.
- How Long to Chill: Ideally, you should refrigerate your cake balls for at least 2 hours. If you’re in a hurry, you can pop them in the freezer for about 30 minutes. Just make sure they’re firm to the touch before you start dipping.
Preventing Cracks
One of the most common issues people face when making cake pops is cracking. But don’t worry—I’ve got you covered with these tips:
- Temperature Matters: Cracking usually happens when there’s a significant temperature difference between the cake ball and the melted candy coating. To prevent this, let your chilled cake balls sit at room temperature for a few minutes before dipping. This way, they won’t be too cold compared to the warm candy melts.
- Thin Out the Candy Coating: If your candy melts are too thick, they can put extra pressure on the cake balls, leading to cracks. Add a teaspoon of vegetable oil or shortening to the melted candy to thin it out and achieve a smoother coating.
Stick Stability
There’s nothing more frustrating than having your cake pops slide off the sticks during dipping. Here’s how to avoid that:
- Dipping the Stick: Before inserting the stick into the cake ball, dip the tip of the stick into the melted candy coating. This acts like glue and helps keep the cake pop securely attached to the stick.
- Inserting the Stick: Push the stick into the cake ball about halfway through. Be gentle but firm to ensure the stick is well-anchored without going all the way through.
Using the Right Tools
A few simple tools can make the process smoother and your results more professional:
- Deep Container for Dipping: Use a deep, narrow container for melting your candy. This allows you to fully submerge the cake pop in one smooth motion, ensuring even coverage.
- Styrofoam Block: After dipping, place your cake pops upright in a Styrofoam block or a cake pop stand. This prevents flat spots from forming on the coating while it sets.
By following these tips, you’ll avoid common mistakes and create perfectly smooth, crack-free cake pops that not only taste amazing but also look like they came straight from a professional bakery!
5. Variations and Customizations
One of the most fun aspects of making Starbucks cake pops at home is the ability to get creative with flavors, colors, and decorations. Whether you’re making them for a special occasion or just because, here are some ideas to help you customize your cake pops and make them truly your own.
Flavor Variations
Why stick to just vanilla when there’s a whole world of flavors to explore? Here are some delicious variations you can try:
- Chocolate Cake Pops: Swap out the vanilla cake mix for a chocolate one and use chocolate frosting for a rich, decadent treat. You can also dip them in dark chocolate candy melts for an extra indulgent experience.
- Red Velvet Cake Pops: Use red velvet cake mix and cream cheese frosting to create a classic combination that’s always a hit. These are perfect for festive occasions like Christmas or Valentine’s Day.
- Lemon Cake Pops: For a zesty twist, use lemon cake mix and lemon frosting. Dip the cake pops in white candy melts and decorate with yellow sprinkles for a bright, sunny treat.
- Funfetti Cake Pops: Use a funfetti cake mix and vanilla frosting for a pop of color inside and out. These are great for birthday parties and other celebrations.
Themed Cake Pops
Cake pops are perfect for themed events because they’re so easy to customize. Here are a few ideas to match your cake pops to the occasion:
- Holiday Cake Pops: Use red and green candy melts for Christmas, or pastel colors for Easter. Add themed sprinkles, like snowflakes or bunnies, to make them even more festive.
- Birthday Cake Pops: Customize the colors and decorations to match the birthday person’s favorite theme. Whether it’s superheroes, princesses, or animals, the possibilities are endless!
- Halloween Cake Pops: Use orange and black candy melts and add spooky decorations like candy eyes, bats, or ghosts. These will be a hit at any Halloween party.
Healthy Alternatives
If you’re looking to make your cake pops a little healthier, here are some simple swaps you can make:
- Gluten-Free Cake Pops: Use a gluten-free cake mix and frosting to make your cake pops suitable for those with gluten sensitivities.
- Vegan Cake Pops: Replace the cake mix and frosting with vegan versions, and use dark chocolate or vegan-friendly candy melts for the coating.
- Lower-Sugar Cake Pops: Use a reduced-sugar cake mix and frosting, or substitute some of the frosting with a healthier option like Greek yogurt. You can also reduce the amount of frosting in the mixture to cut down on sweetness.
Decorative Ideas
When it comes to decorating your cake pops, the sky’s the limit! Here are a few ideas to get you started:
- Sprinkles and Edible Glitter: Add a touch of sparkle with edible glitter or a variety of sprinkles. You can even mix and match colors to suit your theme.
- Drizzles: After the candy coating has set, drizzle melted chocolate or colored candy melts over the top for a stylish look. You can use a piping bag or a fork for this.
- Candy Toppers: Add mini candies, sugar pearls, or edible flowers to the tops of your cake pops for an extra special touch.
By experimenting with these variations and customizations, you can turn a simple Starbucks cake pop recipe into something that’s uniquely yours. Whether you’re catering to a specific dietary need or simply want to add your personal flair, these ideas will help you create cake pops that are as fun to make as they are to eat!
6. Variations and Customizations for Your Starbucks Cake Pop Recipe
Once you’ve perfected your Starbucks cake pops, it’s time to think about how you’re going to serve and present them. Whether you’re planning to enjoy them at home or share them with friends and family, here are some creative ideas to make your cake pops the star of the show.
Pairing Ideas
Cake pops are versatile treats that pair well with a variety of beverages and other desserts. Here are some suggestions to elevate your cake pop experience:
- With Coffee or Tea: Starbucks cake pops were made to be enjoyed with a hot cup of coffee or tea. Whether you prefer a rich espresso, a frothy latte, or a soothing herbal tea, a cake pop makes the perfect sweet accompaniment.
- With Ice Cream: Serve your cake pops alongside a scoop of vanilla or chocolate ice cream for an indulgent dessert that’s sure to impress. The combination of cold, creamy ice cream and the sweet, chewy cake pop is a match made in heaven.
- With a Dessert Spread: If you’re hosting a party or gathering, include cake pops as part of a larger dessert spread. Pair them with cookies, brownies, and mini cupcakes for a fun and festive display that offers something for everyone.
Presentation Tips
How you present your cake pops can make them even more appealing. Here are some ideas to showcase your creations:
- Cake Pop Stand: A cake pop stand is a great way to display your pops upright, making them easy to grab and enjoy. You can find stands in various styles, from simple white to more elaborate designs that match your party theme.
- Decorative Wrappers: Individually wrap each cake pop in a clear cellophane bag and tie it with a ribbon. This not only looks beautiful but also keeps the cake pops fresh and makes them easy to transport.
- Mason Jars or Vases: For a rustic or casual presentation, arrange your cake pops in mason jars or vases filled with decorative stones, beans, or candies. This adds height and visual interest to your display.
- Gift Boxes: If you’re giving cake pops as gifts, arrange them in a decorative box lined with tissue paper. This makes for a thoughtful and delicious present that anyone would love to receive.
Party Desserts
Cake pops are an excellent addition to any party or event. Here’s how you can incorporate them into your celebration:
- Dessert Tables: Add cake pops to your dessert table as a fun, bite-sized option that guests can enjoy throughout the event. Pair them with coordinating desserts like macarons, cupcakes, or fruit tarts.
- Party Favors: Send guests home with a sweet memory by offering cake pops as party favors. Wrap them individually and place them in a basket or on a tray near the exit for guests to take as they leave.
- Centerpieces: Use cake pops as edible centerpieces for your tables. Arrange them in a large vase or on a tiered stand, and decorate with flowers or themed decorations to match the occasion.
By thinking creatively about how to serve and present your Starbucks cake pops, you can turn a simple dessert into a show-stopping centerpiece. Whether you’re enjoying them at home or sharing them with others, these serving suggestions will help you make the most of your homemade cake pops.
7. Make-Ahead and Storage Tips for Your Starbucks Cake Pop Recipe
One of the great things about cake pops is that they’re perfect for making ahead of time, which is especially handy if you’re preparing for a big event or just want to have a sweet treat on hand. Here’s how to make your Starbucks cake pops in advance and store them properly so they stay fresh and delicious.
Making Ahead
If you’re planning to make cake pops ahead of time, here’s how to do it:
- Prepare the Cake and Cake Balls: You can bake the cake, crumble it, mix it with frosting, and form the cake balls up to two days in advance. Once the cake balls are shaped, place them on a lined baking sheet and cover them tightly with plastic wrap or foil.
- Chill the Cake Balls: Store the cake balls in the refrigerator until you’re ready to dip them in candy melts. This will keep them firm and easy to work with when you’re ready to finish the recipe.
- Dip and Decorate Later: If you’re short on time or want to spread out the work, you can dip and decorate the cake pops the day before you plan to serve them. Just make sure the cake balls are well-chilled before you start dipping.
Storing Cake Pops
Proper storage is key to keeping your cake pops fresh and tasty. Here are some tips for storing both finished and unfinished cake pops:
- Storing Finished Cake Pops:
- Room Temperature: Once the cake pops are fully set, you can store them at room temperature for up to a week. Just make sure they’re in an airtight container to prevent them from drying out.
- Refrigerator: If you live in a warm climate or want to keep your cake pops for longer, store them in the refrigerator. Place them in an airtight container and they’ll stay fresh for up to two weeks.
- Freezer: For even longer storage, you can freeze your cake pops. Place them in a single layer in an airtight container, separated by parchment paper to prevent sticking. They’ll keep in the freezer for up to 2-3 months. When you’re ready to enjoy them, just let them thaw at room temperature for a few hours.
- Storing Unfinished Cake Pops:
- Refrigerator: If you’ve prepared the cake balls but haven’t dipped them yet, store them in the refrigerator in an airtight container. They’ll stay fresh for up to two days, so you can dip and decorate them whenever you’re ready.
- Freezer: You can also freeze the undipped cake balls. Just like with finished cake pops, place them in an airtight container with parchment paper between the layers. When you’re ready to finish them, let the cake balls thaw in the refrigerator before dipping.
Tips for Packaging Cake Pops
If you’re making cake pops as gifts or party favors, packaging is important. Here are some tips to ensure your cake pops look as good as they taste:
- Individually Wrapped: Wrap each cake pop in a small cellophane bag and tie it with a ribbon or twist tie. This not only keeps the cake pop fresh but also makes it easy to give as a gift or party favor.
- Gift Boxes: Arrange the wrapped cake pops in a decorative box with tissue paper or shredded paper filler. This makes for a beautiful presentation and keeps the cake pops secure during transport.
- Travel-Friendly Tips: If you’re transporting cake pops to an event, make sure they’re securely packed in a container that prevents them from moving around too much. A cake pop stand or Styrofoam block can be helpful for keeping them upright during transit.
By following these make-ahead and storage tips, you can ensure your Starbucks cake pops stay fresh, delicious, and ready to enjoy whenever you need them. Whether you’re planning ahead for a party or just want to keep a stash of sweet treats on hand, these tips will help you make the most of your homemade cake pops.
8. FAQ about for Your Starbucks Cake Pop Recipe
Even with a straightforward recipe like Starbucks cake pops, you might encounter a few questions or challenges along the way. Don’t worry—I’ve got you covered! Here are some frequently asked questions and troubleshooting tips to help you achieve perfect results every time.
Why Do My Cake Pops Crack?
Cracking is one of the most common issues when making cake pops. Here’s why it happens and how to prevent it:
Temperature Difference: Cracks often occur when there’s a significant temperature difference between the cake balls and the melted candy coating. To prevent this, allow your chilled cake balls to sit at room temperature for a few minutes before dipping them. This reduces the likelihood of cracks forming as the coating hardens.
Thick Coating: If your candy coating is too thick, it can put extra pressure on the cake ball, leading to cracks. Thin out the candy melts with a little vegetable oil or shortening to achieve a smoother, more flexible coating.
How Can I Make Vegan or Gluten-Free Cake Pops?
Making cake pops that fit your dietary needs is easier than you might think:
Vegan Cake Pops: Use a vegan cake mix and frosting (most supermarkets carry these now) and ensure that your candy melts are dairy-free. You can also use dark chocolate or vegan-friendly candy melts for the coating.
Gluten-Free Cake Pops: Substitute the regular cake mix with a gluten-free version. There are plenty of gluten-free cake mixes available that work just as well as the traditional ones. Be sure to also use gluten-free frosting.
Why Do My Cake Pops Fall Off the Sticks?
There’s nothing more frustrating than having your cake pops fall off the sticks during dipping. Here’s how to avoid that:
Dip the Stick: Before inserting the stick into the cake ball, dip the tip of the stick into the melted candy coating. This acts like glue and helps the cake ball adhere better to the stick.
Proper Chilling: Make sure your cake balls are chilled enough before inserting the stick. If they’re too soft, they won’t hold their shape when dipped.
Don’t Overload the Stick: Be gentle when dipping the cake pops. If you’re too rough or the coating is too thick, it can cause the cake ball to slide down or fall off.
How Do I Achieve a Smooth Coating?
A smooth, glossy coating is the hallmark of a perfect cake pop. Here’s how to get it just right:
Thin the Candy Melts: If your candy melts are too thick, the coating will be uneven and lumpy. Add a teaspoon of vegetable oil or shortening to the melted candy to achieve a thinner, smoother consistency.
Dip in One Motion: Dip the cake pop in a single, smooth motion and gently tap off any excess coating by tapping the stick against the side of the bowl. Don’t swirl or twist the pop in the coating, as this can cause uneven coverage.
Can I Freeze Cake Pops?
Yes, you can freeze cake pops, and they’ll stay fresh for up to 2-3 months. Here’s how:
Freezing Finished Cake Pops: Once the cake pops are fully set, place them in a single layer in an airtight container. Separate layers with parchment paper to prevent sticking. When you’re ready to eat them, let them thaw at room temperature for a few hours.
Freezing Unfinished Cake Pops: You can also freeze the undipped cake balls. Follow the same method as for finished cake pops, and let them thaw in the refrigerator before dipping and decorating.
9. Related Recipes
If you loved making these Starbucks cake pops, you’re going to want to try your hand at some of the other delicious recipes on Samuel Recipes. Whether you’re looking to recreate more of your favorite Starbucks treats at home or simply want to explore new and exciting desserts, we’ve got you covered. Here are some related recipes that you’re sure to enjoy:
More Starbucks Copycat Recipes
- Starbucks Cranberry Bliss Bars: If you’re a fan of Starbucks’ seasonal offerings, you’ll love these homemade cranberry bliss bars. They’re bursting with tart cranberries, sweet white chocolate, and a hint of orange zest, all topped with a luscious cream cheese frosting.
- Starbucks Iced Lemon Loaf: This moist, tangy lemon loaf is a perfect replica of the Starbucks classic. It’s topped with a sweet lemon glaze that’s sure to satisfy your citrus cravings.
- Starbucks Double Chocolate Brownies: Rich, fudgy, and incredibly decadent, these double chocolate brownies are a chocolate lover’s dream. They’re easy to make and taste just like the ones you’d buy at Starbucks.
Easy Dessert Recipes
- No-Bake Cheesecake Bites: These bite-sized cheesecakes are quick, easy, and perfect for any occasion. Customize them with your favorite toppings, like fresh berries, chocolate drizzle, or crushed cookies.
- Homemade Chocolate Chip Cookies: Everyone needs a go-to chocolate chip cookie recipe, and this one is a winner. It’s soft, chewy, and packed with gooey chocolate chips.
- Mini Lemon Tarts: These mini lemon tarts are a delightful combination of tart lemon curd and buttery pastry. They’re perfect for parties or when you just want a little something sweet.
Kid-Friendly Treats
- Rainbow Rice Krispie Treats: Bright, colorful, and full of marshmallowy goodness, these rainbow Rice Krispie treats are always a hit with kids (and adults!). They’re super easy to make and perfect for parties.
- Peanut Butter Blossoms: Soft peanut butter cookies topped with a chocolate kiss—what’s not to love? These cookies are a classic for a reason and are always a favorite with kids.
- Fruit Kabobs with Yogurt Dip: For a healthier treat, try these fun fruit kabobs. Serve them with a creamy yogurt dip for a snack that’s as delicious as it is nutritious.
Encourage Experimentation
Don’t be afraid to get creative with these recipes! Try mixing and matching flavors, experimenting with different toppings, or adding your own unique twist. And if you come up with a new favorite variation, be sure to share it in the comments below—I’d love to hear what you come up with!
By exploring these related recipes, you can continue your baking journey and discover even more delicious treats to share with family and friends. Each recipe is designed to be simple and accessible, just like the Starbucks cake pops, so you can enjoy the process as much as the final result.
10. Nutrition Information for your Starbucks Cake Pop Recipe
While Starbucks cake pops are undeniably delicious, it’s always good to know what goes into your treats, especially if you’re mindful of your dietary intake. Here’s a breakdown of the nutritional content for these homemade Starbucks cake pops, along with tips on how to adjust the recipe to meet your nutritional goals.
Nutritional Breakdown (Per Cake Pop)
| Nutrient | Amount |
|---|---|
| Calories | 110-130 |
| Total Fat | 5-6g |
| Saturated Fat | 3-4g |
| Cholesterol | 15-20mg |
| Sodium | 95-120mg |
| Total Carbohydrates | 16-18g |
| Dietary Fiber | 0.5g |
| Sugars | 12-15g |
| Protein | 1-2g |
Note: The exact nutritional values will vary depending on the specific ingredients you use, such as the brand of cake mix and frosting. The values above are estimates based on standard ingredients.
Adjusting for Dietary Needs
Whether you’re trying to reduce sugar, increase protein, or make your cake pops gluten-free, there are simple adjustments you can make to this recipe to suit your dietary needs.
- Lower Calorie Options: If you’re looking to reduce the calorie content, consider using a lower-calorie cake mix or frosting. You can also reduce the amount of frosting mixed into the cake crumbs to lower the overall sugar and fat content.
- Higher Protein Options: Boost the protein content by adding a scoop of vanilla protein powder to the cake mix. You can also use Greek yogurt instead of frosting to bind the cake crumbs, adding a bit of extra protein.
- Gluten-Free: Use a gluten-free cake mix and frosting to make these cake pops suitable for those with gluten sensitivities. Many brands offer gluten-free options that taste just as good as the traditional versions.
- Vegan: Replace the cake mix and frosting with vegan alternatives. There are plenty of plant-based cake mixes available that use ingredients like almond flour or coconut flour, and vegan frostings that are just as creamy and delicious.
Impact of Variations
Keep in mind that any changes to the recipe, such as using different flavors or making dietary substitutions, will affect the nutritional content. For example:
- Using Dark Chocolate: If you use dark chocolate instead of candy melts, you’ll increase the antioxidant content and potentially lower the sugar content, depending on the type of chocolate used.
- Adding Nuts or Seeds: Adding crushed nuts or seeds to the cake mixture or as a topping will increase the healthy fat and protein content, making the cake pops more filling.
- Reducing Frosting: By using less frosting, you can reduce the overall sugar content. This might result in slightly less moist cake pops, but they’ll still be delicious.
Moderation is Key
While these cake pops are a delightful treat, they are still a dessert and should be enjoyed in moderation. If you’re watching your sugar or calorie intake, try limiting yourself to one or two cake pops at a time, and balance them with other healthy choices throughout the day.
By understanding the nutritional content and making mindful adjustments, you can enjoy these Starbucks cake pops as part of a balanced diet. Whether you’re indulging in a sweet treat or catering to specific dietary needs, this recipe offers flexibility and flavor in every bite.
11. Conclusion
And there you have it—your ultimate guide to making Starbucks cake pops at home! Not only are these cake pops easy to make, but they’re also incredibly versatile, allowing you to customize them to suit any occasion or dietary need. From the cost savings to the endless flavor possibilities, there are so many reasons to give this recipe a try.
I’d love to hear how your cake pops turn out! Did you try any of the flavor variations? Or maybe you came up with your own unique twist? Share your experiences, tips, and photos in the comments below. Your feedback not only helps other readers but also inspires me to keep creating and sharing new recipes.
If you enjoyed this recipe, be sure to check out more on Samuel Recipes. Follow us on social media for daily inspiration, cooking tips, and sneak peeks of upcoming recipes. Whether you’re a seasoned home cook or just getting started, there’s always something new to discover and enjoy.
Happy baking! 🍰