

Table of Contents
Looking for a 25-minute dinner solution? These cheesy garlic chicken wraps perfectly solve your hectic weeknight meal challenges.
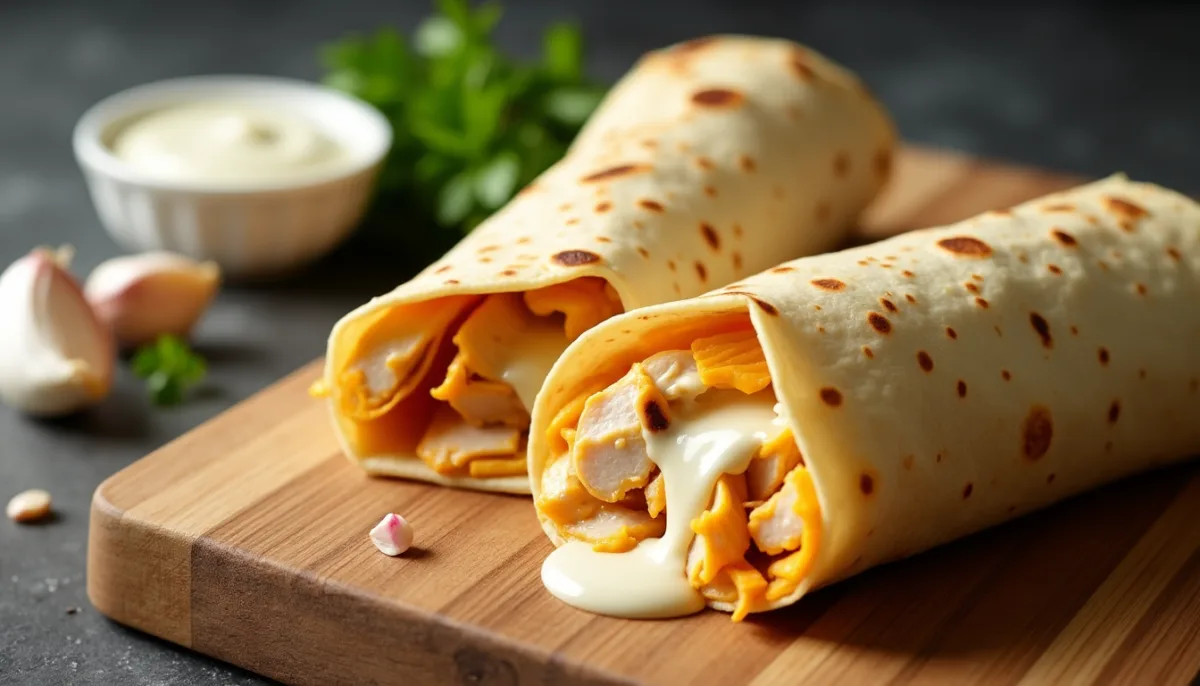
The recipe has become such a family favorite that children celebrate at the sight of ingredients on the counter. Two large chicken breasts combined with generous portions of cheddar and mozzarella cheese create wraps that burst with flavor and protein. The blend of tender chicken, melted cheese, and creamy garlic sauce makes a meal everyone at the table will enjoy. You can stick to our classic recipe or add your favorite vegetables to make it your own.
These quick and delicious wraps will revolutionize your dinner routine. Our foolproof recipe ensures you’ll have dinner ready before anyone asks “What’s for dinner?”
Quick Prep Steps Before You Start
Smart prep work makes these cheesy garlic chicken wraps a breeze to make. Let me walk you through a proven timeline and workspace setup that will give a smooth cooking experience.
30-Minute Timeline Breakdown
The right timing helps get these wraps to the table quickly. Here’s how to break down your 30-minute cooking window:
- First 5 Minutes:
- Gather ingredients and equipment
- Heat the pan to medium-high temperature
- Season chicken with chosen spices
- Next 10 Minutes:
- Cook chicken until internal temperature reaches 165°F
- Prepare other ingredients while chicken cooks
- Shred cheese and mix sauce components
- Final 15 Minutes:
- Warm tortillas (10 seconds each)
- Assemble wraps with fillings
- Grill assembled wraps for 2-3 minutes per side
Setting Up Your Workspace
A well-laid-out kitchen space makes the cooking process better. Your workspace should be arranged into these zones:
Prep Station
- Place a cutting board to prepare chicken
- Keep seasonings close by
- Set up a thermometer to check chicken temperature
Assembly Area
- Clear counter space to lay tortillas
- Put ingredients in order of assembly
- Keep a warm, low-heat oven (200°F) ready to keep finished wraps hot
Storage Solutions To meal prep effectively:
- Store shredded chicken in airtight containers up to 3 days
- Keep cream cheese mixture separate until assembly
- Stack finished wraps with parchment paper between layers
Pro Tips for Success:
- Buy extra cream cheese when it’s on sale – it freezes well
- Tortillas last longer when stored in the fridge
- The oven at 200°F works great to keep wraps warm in a covered baking dish when cooking for groups
- You can prep ahead by shredding chicken, mixing cream cheese blend, and grating cheese
Toothpicks are great to secure wraps that might open during grilling. On top of that, it’s nice that these wraps taste great whether served hot or cold.
Creating the Cream Cheese Garlic Sauce
Creating irresistible cheesy garlic chicken wraps starts with becoming skilled at making cream cheese garlic sauce. This velvety blend is the foundation of our wrap’s distinctive flavor profile.
Mixing the Perfect Sauce Consistency
Your cream cheese should be softened at room temperature for 30 minutes. Mix 8 ounces of cream cheese with 2 tablespoons of grated Parmesan cheese and 2 minced garlic cloves. You’ll get optimal smoothness by melting the ingredients together over medium heat with constant stirring.
A silky texture comes from adding ingredients gradually. Melt butter over medium heat, then blend in cream cheese and garlic. Keep stirring to prevent lumps. The sauce will become smooth as you slowly add cream or milk to reach your desired consistency.
Make-Ahead Storage Tips
The cream cheese sauce stays fresh for 3-5 days in an airtight container in your refrigerator. You can freeze portions in zippered bags up to 4 weeks if you need longer storage.
The sauce might look separated after reheating – this happens naturally since solid ingredients return to their original state when cold. Here’s how to bring back the original consistency:
- Warm gently in a saucepan over medium-low heat
- Whisk continuously while heating
- Add a splash of warm milk to adjust thickness
Flavor Variations to Try
Your garlic cream sauce can shine with these tested combinations:
Herb Additions:
- Dried oregano and parsley create a classic Italian profile
- Fresh chives add bright, oniony notes
- Dried basil brings a subtle mint-like sweetness
Spice Enhancements:
- Chipotle powder and cumin offer southwestern flair
- Cajun seasoning provides a bold kick
- Red pepper flakes deliver gentle heat
Half-and-half works well as a lighter alternative to heavy cream. Full-fat cream cheese still gives you the most luxurious results. The Parmesan’s natural saltiness means you should taste and adjust seasonings as you go.
Making the Chicken and Cheese Filling
Tender and perfectly seasoned chicken is the star of these delectable wraps. A simple one-pan technique will give maximum flavor and minimal cleanup.
One-Pan Cooking Method
The chicken needs dicing and seasoning with a flavorful mix of olive oil, garlic powder, onion powder, paprika, salt, and pepper. This blend creates reliable foundations for the filling. Each piece of chicken should be coated with the seasoning mixture to get optimal results.
A non-stick skillet works best over medium heat. The seasoned chicken goes in once the pan gets hot. Cook it for 6-8 minutes and stir occasionally until it turns golden brown. The perfect sear makes all the difference – those crispy golden bits add depth to each bite.
Pro Tips for Perfect Chicken:
- The pan shouldn’t be overcrowded to cook evenly
- Cook until internal temperature reaches 165°F
- Let the chicken rest 5 minutes before shredding
Several alternative cooking methods work just as well if time is short:
- Boil chicken breasts in salted water for 15-20 minutes
- Use a rotisserie chicken from the store
- Cook chicken in an Instant Pot for quick results
Mix the cooked chicken with shredded Monterey Jack and cheddar cheese. This cheese combination creates that perfect melty texture you need for outstanding wraps. The tender chicken and melted cheese together make an irresistible filling that stays intact.
Cheese Selection Tips:
- Mozzarella works best for pan-frying and creates a gooey texture
- Cheddar provides robust flavor when served unmelted
- Any good melting cheese works based on your preference
Spread the garlic sauce on tortillas and add the chicken-cheese mixture. Roll everything up snugly so the filling stays in place. The assembled wraps go back in the skillet for 2-3 minutes per side until they turn golden brown and crispy. This final step brings all flavors together and creates that perfect crispy exterior.
Easy Wrap Rolling Guide
Becoming skilled at rolling these cheesy garlic chicken wraps will give a perfect blend of flavors in every bite. Here are some proven techniques that will help you get picture-perfect results.
Step-by-Step Rolling Instructions
Your tortilla needs to be warm for the best flexibility – cold ones tend to tear or break. Place it on a clean surface and spread ingredients on one-third of its surface area. The filling should go slightly off-center, toward the bottom half of the tortilla instead of right in the middle.
For the perfect roll:
- Fold the left and right edges toward the center, leaving about an inch between them
- Bring the bottom edge up to cover half the filling
- Pack the ingredients tightly with a spoon or fork
- Keep rolling forward while maintaining tension
- Add a small amount of sauce along the final edge as a sealant just before finishing
Pro Tip: Give your wrap a gentle press after rolling to help keep its shape. If you’re making grilled versions, place the seam-side down and cook for 2-3 minutes on each side.
Common Rolling Mistakes to Avoid
Your wrap’s structure can fail in several ways. We found these common errors happen most often:
- Cold tortillas from the fridge become brittle and tear easily
- Too much filling beyond one-third of the tortilla makes wraps messy and hard to manage
- Centered ingredients create uneven distribution instead of being slightly off-center
- Loose rolling lets ingredients fall out, while overly tight rolling pushes fillings out the ends
Storage Solutions: Skip the plastic wrap for make-ahead versions since it makes them soggy. Parchment paper or aluminum foil works better to keep them fresh. When serving right away, cut diagonally and put the folded edge at the bottom so they don’t unravel.
Note that with enough practice, you’ll create restaurant-quality cheesy garlic chicken wraps that stay intact through every delicious bite.
Conclusion
Busy weeknight dinners call for these cheesy garlic chicken wraps. Good preparation and organization will help you create these delicious wraps in 30 minutes.
You need to nail three elements to make perfect wraps. A creamy garlic sauce adds rich flavor. The chicken should be cooked just right and paired with melted cheese. Your rolling technique keeps everything neatly wrapped. I’ve made these wraps so many times that I can guarantee restaurant-quality results from your kitchen if you follow these steps.
Your wrap-rolling skills will improve with practice. Try different cheese combinations and seasonings to create your family’s favorite version. Start with our simple recipe and adjust the ingredients based on your priorities. These cheesy garlic chicken wraps could soon become your go-to meal for everyday dinners and special occasions.
FAQs
How can I prevent my chicken wraps from becoming soggy?
To keep your chicken wraps from getting soggy, cut them in half just before placing them in a lunch bag. This helps keep the filling inside and prevents sogginess, especially if the container is larger than the wrap itself.
What are some good side dishes to serve with chicken wraps?
Popular side dishes for chicken wraps include French fries, potato chips, a simple salad, fresh fruit like grapes or apple slices, soup, pasta salad, or roasted vegetables. These options complement the flavors of the wrap and add variety to your meal.
Are chicken and cheese wraps a healthy meal option?
Chicken and cheese wraps can be a relatively healthy meal choice, especially when made with lean chicken and whole grain tortillas. To make them even healthier, consider using low-fat cheese and adding plenty of vegetables. The protein content makes them a satisfying option for those watching their weight.
What’s the secret to rolling a perfect wrap?
The key to rolling a perfect wrap is to warm the tortilla first for pliability, place the filling slightly off-center towards the bottom, fold in the sides, then roll tightly from the bottom up. Avoid overfilling and use a small amount of sauce along the final edge to seal the wrap.
How can I add more flavor to my chicken wraps?
To enhance the flavor of your chicken wraps, experiment with different seasonings for the chicken, such as garlic powder, paprika, or cajun spices. You can also try various cheese combinations or add herbs to your cream cheese sauce. Don’t forget to include crunchy vegetables for texture and fresh flavors.